For the longest time, I was intimidated by the idea of making sourdough. I was afraid I’d mess it up and convinced myself it was too complicated to even try. But I couldn’t have been more wrong! It’s actually a lot simpler than it seems. Yes, it requires some patience and planning—but once you get into the rhythm, the process is incredibly rewarding. Now, I bake all my own bread. It’s not difficult or time-consuming, but it does take a bit of forethought and an awareness of your schedule. I bake this Soft Sourdough Bread recipe every week and it is one of my most asked for recipes.
In this post, I’ll walk you through my weekly sourdough routine, how I fit it into my life while working a demanding full-time job, and share the tips and tricks that helped me along the way.
One of the most important things to keep in mind when baking sourdough is that your environment matters. Your climate, kitchen temperature, and even humidity levels can all affect the outcome. I watched countless videos with great techniques, but many just didn’t work for me until I adjusted them to suit my conditions. So don’t be afraid to tweak and experiment.
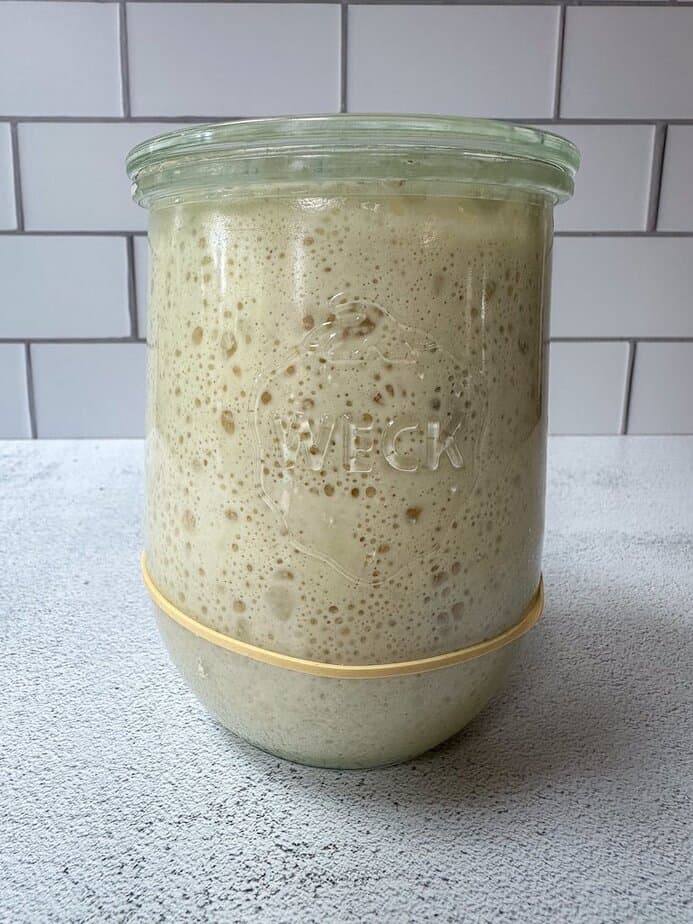
Let’s start with the basics: you’ll need a sourdough starter. You can easily make your own by mixing flour and water and allowing it to ferment naturally. Here’s a simple guide on how to create your own sourdough starter from scratch. Alternatively, you can get some from a friend who already has one going, or purchase a starter online (King Arthur is a great option).
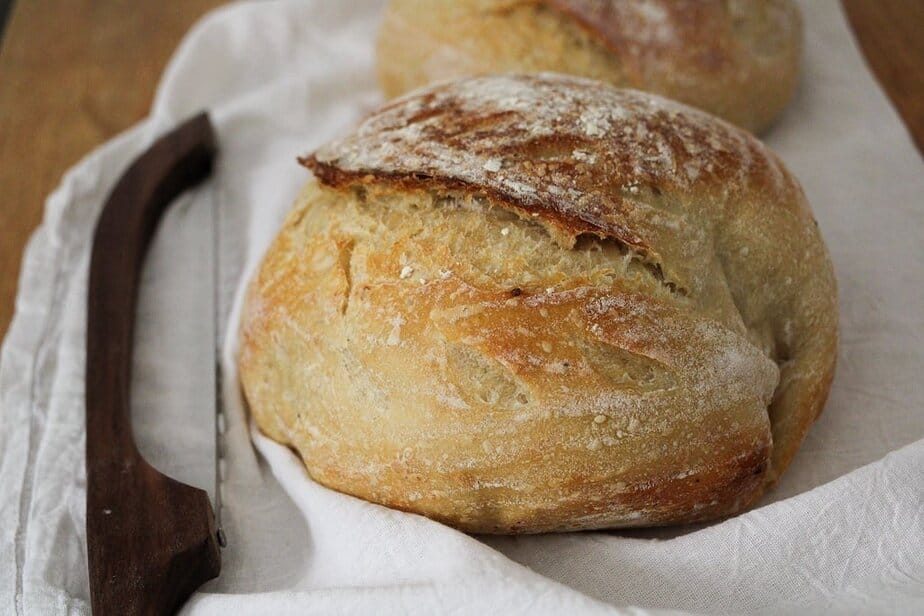
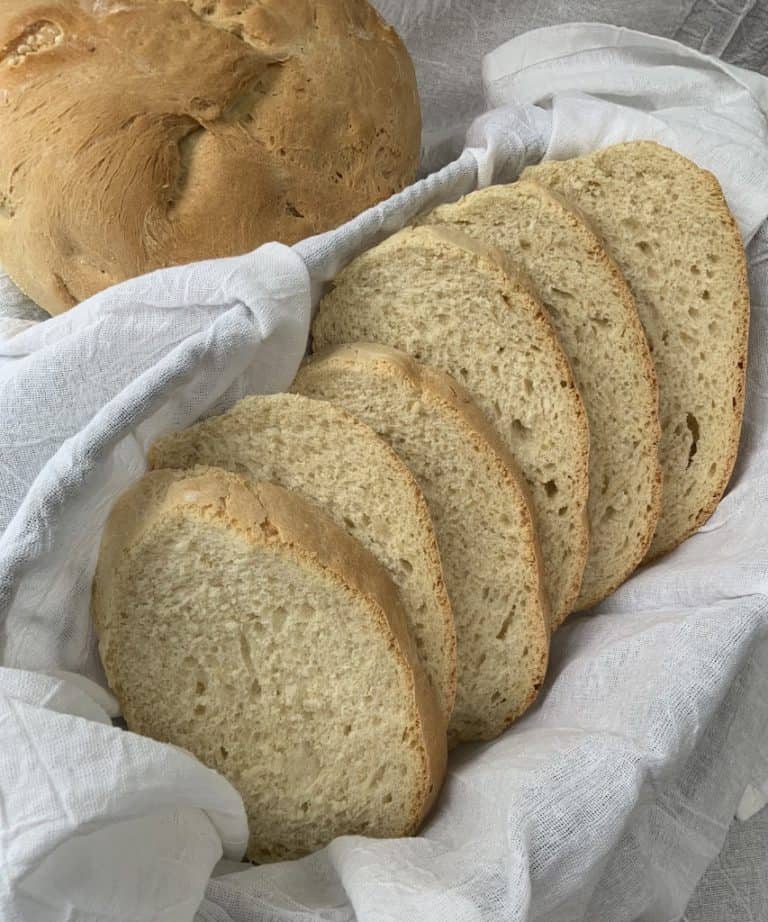
The recipe I use produces a soft, airy loaf with just a hint of tang. It has a chewy texture and a rich, delicious flavor—perfect for sandwiches, toast, dipping, or simply enjoying warm with a smear of butter. Because honestly, nothing beats a slice of fresh bread with good old-fashioned butter.
Ingredients
- Water: 310 grams Filtered water is best to remove any bleach or other additives that can interfere with the fermentation process.
- Active Starter: 100 grams active sourdough starter. Recipe for How to Make a Sourdough Starter
- Salt: 10 grams or 1 teaspoon.
- Olive oil: 12 grams or 1 tbsp. Aids in softening the texture.
- Honey: 15 grams or 1 tbsp of raw honey. The honey adds a slightly sweet flavor to balance the tanginess of the fermented starter. It also helps with the rise of the dough and the airy texture of this bread.
- Bread flour: 500 grams of bread flour: has a higher gluten and protein content which makes the bread more airy and chewy.
To get 100 grams active starter: Feed 50 grams starter with 50 grams water + 50 grams unbleached all-purpose flour. Should yield 150 grams active starter, therefore you will have 50 grams leftover to use for future bakes.
Equipment
- Large bowl
- Danish whisk or large wire whisk
- Kitchen Scale or measuring spoons/cups
- Proofing basket such as a banneton basket or bowl
- Dutch oven with a lid
- Bread Lame
Make Your Dough
Yields: 1 Sourdough Loaf
I recommend using a kitchen scale to weigh your starter, water, and flour, it helps with consistency. But if you don’t have one, don’t worry I have listed standard and metric.
This is a no-knead sourdough bread recipe. We will activate gluten formation by a process called Autolyse, and series of Stretch and Folds.
Step 1: Mix Wet Ingredients
In a large mixing bowl, combine:
- 310g (1 1/4 cups + 2 tsp) water
- 100g (1 cup) active sourdough starter (Levain)
- 12g (1 tbsp) olive oil
- 15g (1 tbsp) honey
- 10g (1 tsp) salt
Use a Danish whisk, large wire whisk, or even a fork to mix wet ingredients and salt together. Whisk to incorporate the starter thoroughly – it will look milky.
Step 2: Add Flour
Next, add:
- 500g bread flour
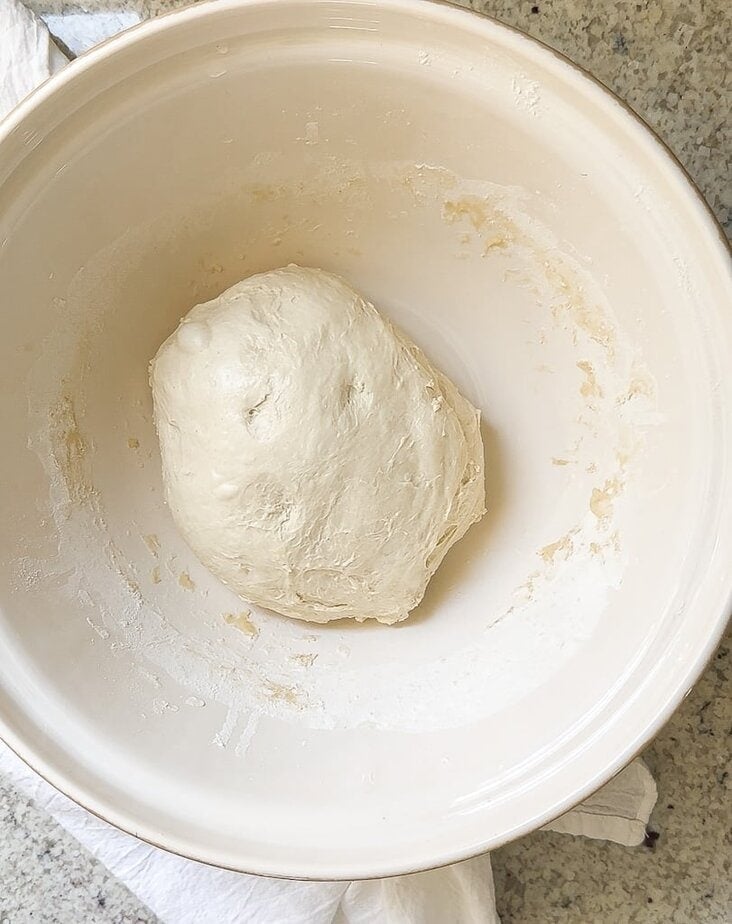
Using your hands, gently mix the flour into the wet mixture. I like to use a slow, circular motion to gradually incorporate the flour until the dough comes together, picking up the dry bits at the bottom and around the bowl. It will be slightly moist and shaggy—this is exactly what you want.
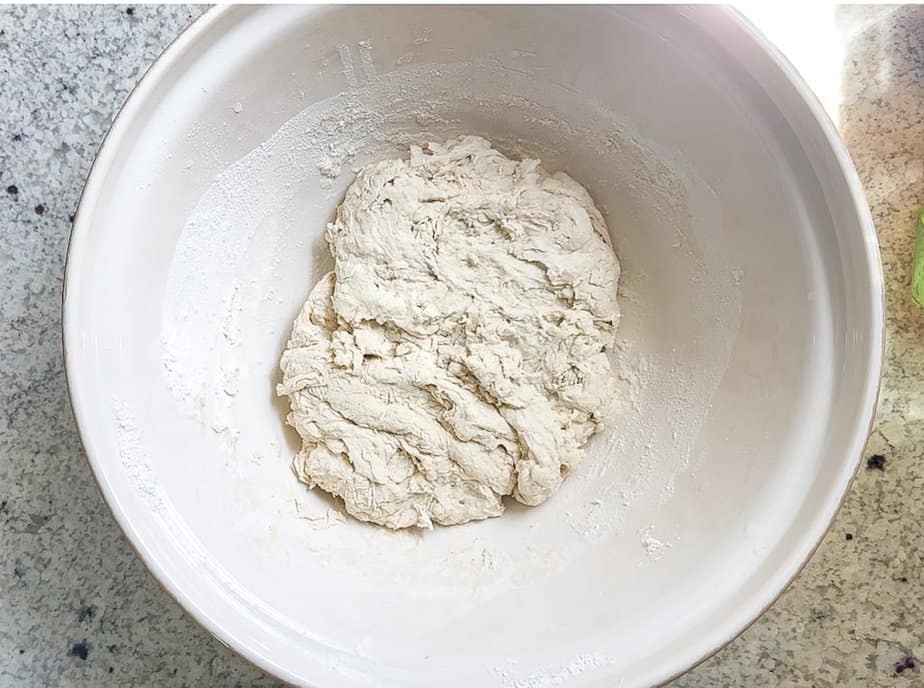
Cover the bowl with a towel and let the dough rest for 1 hour. This step is called Autolyse, it gives the gluten a head start in developing, which helps create a strong, elastic dough.
Step 3: Stretch and Fold
Now it’s time to build structure in the dough with four sets of stretch and folds, spaced 30 minutes apart.
Example of Timeline:
- 5:00 PM – Mix the dough, cover, and let rest (autolyse)
- 6:00 PM – First stretch and fold
- 6:30 PM – Second stretch and fold
- 7:00 PM – Third stretch and fold
- 7:30 PM – Final stretch and fold
After the last fold, cover the bowl and let it rest in a warm, draft-free place for 8–10 hours. This phase is called bulk fermentation or the first proof. If your kitchen is warm or humid, fermentation may happen faster (as quick as 6 hours in some cases).
Stretch and Fold Technique:
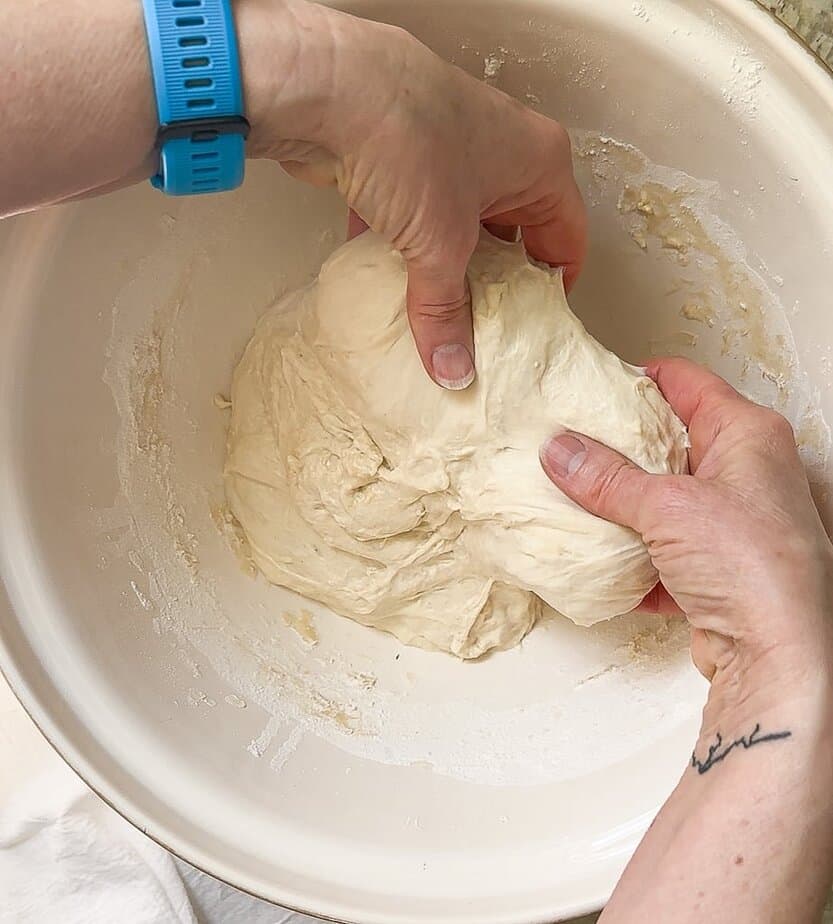

Uncover the dough and lightly wet your hands. Grab one side of the dough, gently pull it up to stretch it, and fold it over the center. Rotate the bowl a quarter turn and repeat. Do this all the way around the bowl. Cover again and rest for 30 minutes. Repeat this process three more times. You will feel the dough starting to strengthen throughout the stretch and folds.
Would you like to save this?
Step 4: Shape the Dough
Prepare your proofing bowl or banneton basket by heavily dusting the inside with flour. I recommend using rice flour, it doesn’t stick to the dough as easily.
Turn your dough out onto a lightly floured surface. Gently stretch it into a rough rectangle. Fold the left and right sides into the center, then roll it from top to bottom into a loose log. Tuck the edges under as you roll to create surface tension.
With the seam-side down, tighten the dough by gently pulling it toward you on the countertop. Turn it a quarter turn and repeat this motion 4–5 times until the dough feels taut and smooth.
For a final seal, use a bowl scraper to gently scoop under and rotate the dough 3–5 times.
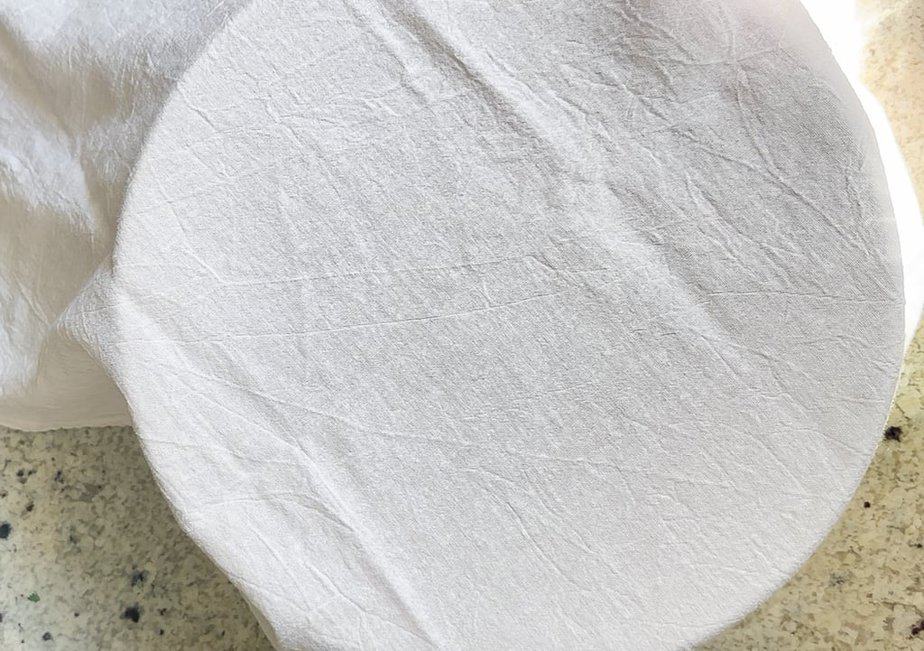
Place the shaped dough seam-side up into your prepared proofing basket. Cover with a floured towel or the basket’s cloth cover. Let it rest in your proofing area for another 8–10 hours. (Note: in hot or humid weather, it may fully proof in as little as 2 hours.)
Step 5: Bake
If you’re using a Dutch oven, place it inside your oven and preheat to 450°F.
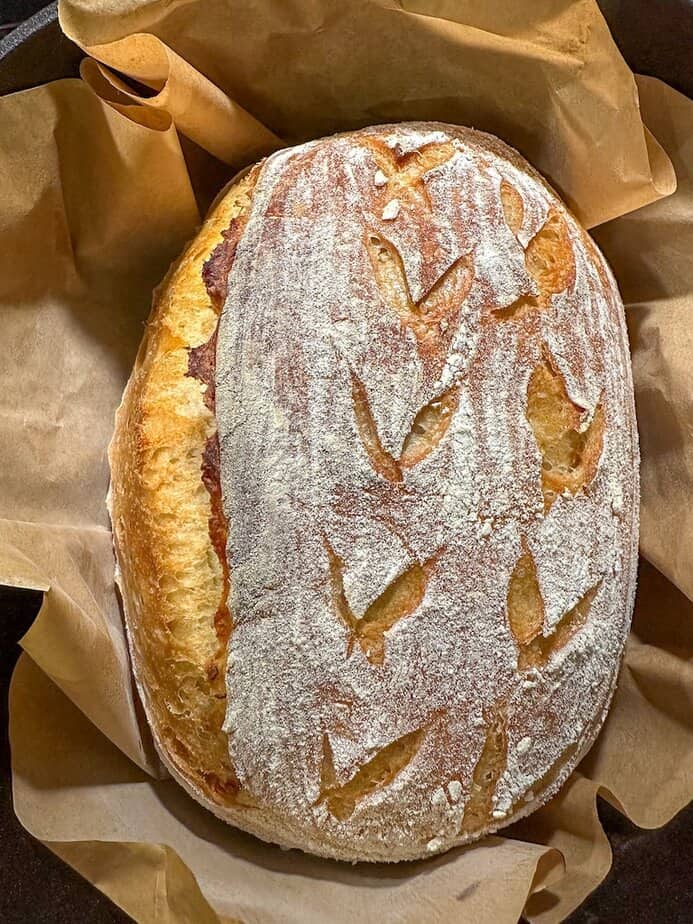
While the oven heats, carefully flip the dough out of the basket onto parchment paper. Dust off any excess flour. Use a bread lame, scissors, or a sharp knife to score the top. This not only helps the bread expand properly in the oven, it’s also where you can have fun with creative designs!
Once the oven is ready, use the parchment to lift the dough into the hot Dutch oven. Cover with the lid and bake for 20 minutes. Then remove the lid, reduce the temperature to 400°F, and bake for another 25 minutes, until the crust is golden and crisp. Transfer to a wire rack to cool thoroughly before slicing.
Serve and Enjoy this delicious Homemade Soft Sourdough Bread!
Sourdough Bread Making While Working a 9-5 job This is how I work my Sourdough Baking Schedule: I will take my starter out of the refrigerator the morning of the day I want to start a batch of sourdough. I’ll give it a feeding so it will be active when I get home. When I get home from work, I’ll start my dough and set it for bulk fermentation overnight. When I get up the next morning, I will shape the dough and proof it a second time so that it’s ready to bake when I get home that day.
Storage
Store cooled bread in a re-usable bread bag or large ziplock bag for up 5 days at room temperature, 1 week if stored in the refrigerator, and 3 months if stored in the freezer. * It’s important to remember that homemade bread has no preservatives, which is good! But this also means that it will mold quicker than store-bought.
What is Autolyse
Autolyse is a resting period that allows the flour to fully absorb the water which kickstarts gluten development. This simple step helps improve the dough’s texture, making it easier to work with and resulting in a softer, more structured loaf.
Bulk Fermentation
Bulk fermentation is the first rise in the sourdough-making process. During this phase, the dough slowly ferments and typically doubles in size over 8–10 hours. You may also hear this step referred to as the first proof, first rise, or bulk rise. It’s during this time that much of the flavor develops, the dough strengthens, and the texture becomes light and airy. As the natural fermentation happens, acids and carbon dioxide are produced—creating those beautiful bubbles and airy pockets in the dough.
How do you know when bulk fermentation is complete?
One way is to gently shake the bowl—the dough should have a light jiggle to it. It should also appear puffed up, roughly doubled in size, with bubbles visible on the surface. Learning to recognize this stage takes some practice. Ending the bulk fermentation too early or too late can affect the final texture and shape of your bread. My best advice? Keep practicing. It took me several bakes before I consistently “got it right.”
Sourdough Benefits
Sourdough isn’t just delicious—it’s also packed with beneficial nutrients. Thanks to its natural fermentation, sourdough is often easier to digest than conventional bread. The fermentation process helps break down gluten and supports a healthy gut microbiome. It’s also a good source of essential vitamins and minerals, including magnesium, folate, niacin, potassium, and calcium.
Another big plus: sourdough has a lower glycemic index than regular white bread, meaning it’s less likely to cause spikes in blood sugar.
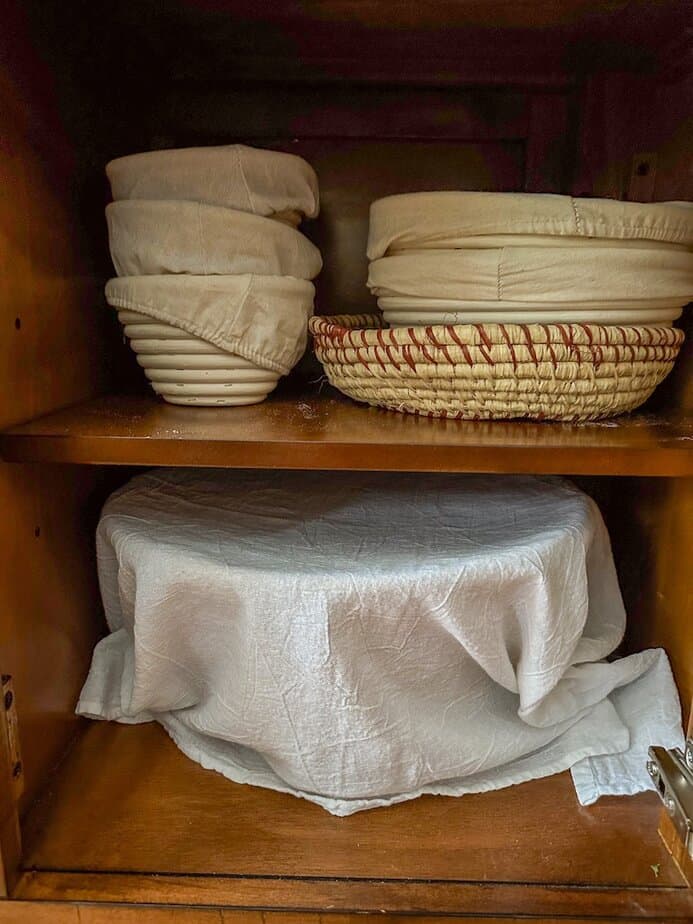
Where Should I Store My Dough During Proofing?
During proofing, it’s best to keep your dough in a warm, enclosed space. A turned-off oven, cupboard, or proofing box works great. I keep mine in a cabinet dedicated to sourdough—it stays warm and consistent, and it’s worked really well for me. See picture 👇
What If My Bread Doesn’t Rise or Turns Out Too Firm?
Don’t worry—this is totally normal when you’re starting out. Sourdough is very sensitive to the environment, and things like temperature and humidity play a big role in how your dough rises. My first few loaves tasted great but didn’t have the lift I was hoping for. I kept tweaking and adjusting until I got the texture I wanted, and that’s how this recipe was born.
Just keep at it. With time and practice, you’ll get a feel for what works best in your own kitchen.
Why this recipe works
- The texture of this bread is more soft and chewy than a Basic Sourdough.
- The crust is also a bit softer than Basic Sourdough which makes it a great everyday bread.
- You can adjust the timeline to fit your schedule.
- The honey balances the tanginess of the sour creating a beautiful flavor profile.
- You can serve this bread with any dish, soup, or salad. It also works well with this Cherry Tomato Bruschetta recipe.
I hope you love this recipe as much as we do! Please leave a comment 👇
As a disclaimer, this post may contain affiliate links by which I may receive a small commission. All product links are items I personally use in my kitchen.
Soft Sourdough Bread
Equipment
- Large bowl
- Kitchen Scale or measuring cups/spoons
- Danish whisk or wire whisk
- Bread Lame or small sharp knife
Ingredients
- 310 grams water
- 100 grams active sourdough starter
- 10 grams salt 1 tsp
- 12 grams olive oil 1 tbsp
- 15 grams honey 1 tbsp
- 500 grams bread flour 4 cups
Instructions
Step 1 – Mix Wet Ingredients
- In a large bowl, use a wire whisk to mix wet ingredients and salt together. Whisk to incorporate the starter thoroughly – it will look milky.
Step 2 – Add Flour Then Autolyse
- Using your hands, gently mix the flour into the wet mixture. I like to use a slow, circular motion to gradually incorporate the flour until the dough comes together, picking up the dry bits at the bottom and around the bowl. It will be slightly moist and shaggy—this is exactly what you want.
- Cover the bowl with a towel and let the dough rest for 1 hour. This step is called Autolyse—it gives the gluten a head start in developing, which helps create a strong, elastic dough.
Step 3 – Pull & Folds
- Now it’s time to build structure in the dough with four sets of stretch and folds, spaced 30 minutes apart.Example:5:00 PM – Mix the dough, cover, and let rest (autolyse)6:00 PM – First stretch and fold – cover6:30 PM – Second stretch and fold – cover7:00 PM – Third stretch and fold – cover7:30 PM – Final stretch and fold – cover and store for Bulk FermentationStretch and Fold technique:Uncover the dough and lightly wet your hands. Grab one side of the dough, gently pull it up to stretch it, and fold it over the center. Rotate the bowl a quarter turn and repeat. Do this all the way around the bowl. Cover again and rest for 30 minutes. Repeat this process three more times. You will feel the dough starting to strengthen throughout the stretch and folds.After the last fold, cover the bowl and let it rest in a warm, draft-free place for 8–10 hours. This phase is called bulk fermentation or the first proof. If your kitchen is warm or humid, fermentation may happen faster (as quick as 6 hours in some cases).
Step 4: Shape the Dough
- Prepare your proofing bowl or banneton basket by heavily dusting the inside with flour. I recommend using rice flour—it doesn’t absorb into the dough as easily and helps prevent sticking.
- Turn your dough out onto a lightly floured surface. Gently stretch it into a rough rectangle. Fold the left and right sides into the center, then roll it from top to bottom into a loose log. Tuck the edges under as you roll to create surface tension.With the seam-side down, tighten the dough by gently pulling it toward you on the countertop. Turn it a quarter turn and repeat this motion 4–5 times until the dough feels taut and smooth.For a final seal, use a bowl scraper to gently scoop under and rotate the dough 3–5 times.Place the shaped dough seam-side up into your prepared proofing basket. Cover with a floured towel or the basket’s cloth cover. Let it rest in your proofing area for another 8–10 hours. (Note: in hot or humid weather, it may fully proof in as little as 2 hours.)
Step 5: Bake
- If you’re using a Dutch oven, place it inside your oven and preheat to 450°F.
- While the oven heats, carefully flip the dough out of the basket onto parchment paper. Dust off any excess flour. Use a bread lame, scissors, or a sharp knife to score the top. This not only helps the bread expand properly in the oven—it’s also where you can have fun with creative designs!
- Once the oven is ready, use the parchment to lift the dough into the hot Dutch oven. Cover with the lid and bake for 20 minutes. Then remove the lid, reduce the temperature to 400°F, and bake for another 25 minutes, until the crust is golden and crisp.
- Transfer to a wire rack to cool.Once cooled, serve and Enjoy!


Made my first loaf of Sourdough bread! Once you get past the fear it is easy and delicious!!
I’m so happy you made your first Sourdough bread!!! You will be hooked now!